AutoForms Designer
PERMISSIONS Security level with permission to configure AutoForms & LiveLinks
NAVIGATION Left Navigation Menu > Admin > Admin Categories > Automation > AutoForms & LiveLinks > AutoForms Designer
About AutoForms Designer
The AutoForms Designer Wizard generates the components of a form used to collect and move new leads from a Web page directly into Autotask.
AutoForms can add information to existing organizations, or capture new lead information. You control which fields to include and whether they are required.
Anyone with HTML programming experience can format the forms to match your corporate web site. You can then incorporate the HTML code into the web site and replace the "Contact Us" or "More Information" form. AutoForms can also reside on a PC.
Your organization can create any number of forms, built for general data collection or specific purposes. Once generated, AutoForms can capture and create the following:
- Organizations
- Contacts
- Opportunities
- To-Dos
- Notes
The optional AutoForms notifications can automatically notify specified resources when new data is collected.
IMPORTANT The date fields in AutoForms Designer only support the mm/dd/yyyy format. We recommend that you add this format information to the date field labels. Example: Create Date (mm/dd/yyyy).
Managing AutoForms
On the AutoForms Designer page, you create new, and edit existing AutoForms.
To create a new AutoForm, click New. Refer to Creating a new AutoForm.
Use the context menu to manage existing AutoForms. You can:
- Edit an existing AutoForm. All settings can be modified. Refer to Creating a new AutoForm.
- Open a window that contains the Error Log.
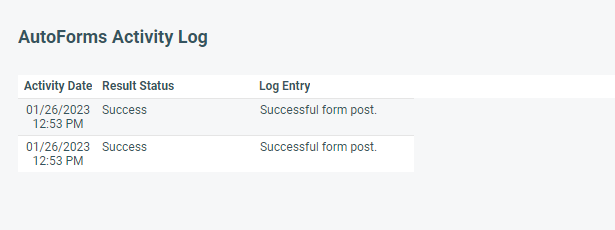
- Open a window that contains an Activity Log.
- Delete an AutoForm. Deletion cannot be undone.
Creating a new AutoForm
To create a new AutoForm, do the following:
- To open the page, use the path(s) in the Security and navigation section above.
- Click New to open the New AutoForm window.
| Field or Option | Description |
|---|---|
| AutoForm Name* | Required. Enter a name for the new form. |
| Please select each entity you would like on the AutoForm | Select each entity type for which the new form will collect data. Organization is already selected and read only because it is required in Autotask. In Autotask each entity must be associated with an organization. |
| Please configure the default behavior each time an AutoForm is submitted. | |
| When an AutoForm is successfully posted, redirect to: | Enter the complete URL for the page that will display after successful submission. Typically, this page would thank the user for their interest and inform them of next steps, such as: "We will contact you within 24 hours". |
| Please select the notification level when an error occurs: |
Specify what automatic notification should occur if the submission fails. Options include None (no notification), Log Only (generate an entry in the error log), and Log and Redirect to Error Page (both options occur). If you select the option to redirect to an error page, you must provide the URL for the error page in the next field. |
| When an error occurs in posting an AutoForm, redirect to: |
Required if you selected the Log and Redirect to Error Page option in the previous field. Enter the complete URL for a page that will display if the form submission fails. Typically, this page informs the user that the submission was not successful and provides alternative options to contact you, for example, an email address or phone number. |
On the Fields tab, you select the data collection fields for your form.
The Fields tab displays the complete list of fields available from the Organization table and from the tables for all other entities you selected on the General tab. User-Defined Fields are included.
IMPORTANT You cannot have a User-Defined Field from any entity that has the same name as a standard Autotask field. If you have a User-Defined Field name that is the same as an Autotask field name, edit the UDF and add another word or additional characters to the name. Multi Select UDF lists can be added but not selected on the AutoForm.
| Column Name | Description |
|---|---|
| AutoForm Field Name | This is the name of the field in Autotask. All fields in all tables (entities) that were checked on the previous page are displayed in this table. User-Defined Fields are included. |
| Default Value | Optionally, you can specify or select a default value to populate the field. The field does not need to appear on the form to have a default value. For example, the form on your corporate Web site can set the default value for Organization Type to "Lead". All submissions from that Web site will then be added to your Autotask instance as Organization Type "Lead". If displayed on the form, you can make the default value editable. |
| Displayed on AutoForm | Select this check box to display the field on the form. TIP To include a value for this field without displaying it on the form, provide a default value. |
| Editable on AutoForm | Select this check box to allow the user to edit the field. Be sure to check this field if you display the field and want the user to be able to enter new data or edit a default value. |
| Input Required on AutoForm | Select this check box to make the field required, that is, the user cannot submit the form without providing a value. A red star (*) identifies Required fields. |
| AutoForm Field Label | The label that identifies the field on the form. It should describe what data should be entered in the field. For example, the default field name "Organization" could be replaced with "Organization Name", or "Enter your Organization Name here". |
Adding fields from the Organizations table to your AutoForm
- Use the field named Organization on forms designed to add information to existing Organizations. On the form the field will include a drop-down menu from which the user can choose from all organizations available at the time the form was created.
If a specific Organization is selected here and editable is not checked, the form is only valid for that one Organization.
EXAMPLE If you are designing a form to enter contacts for any existing Organization, select the field Organization to display on your form. Note that the selection list for the Organization field is created when you publish your form, and your form will occasionally need to be re-published to stay current.
- Use the Organization Name field on forms designed to capture leads on your web site. The user can add a new Organization name into your Autotask instance. Include any additional fields needed to collect information for a new organization.
- Organization and Organization Name fields are mutually exclusive. If you check Displayed on AutoForm for one of them, it is cleared for the other one.
- Two Organization fields are required: Organization Type and Account Manager. You must provide data for these fields whether or not they are displayed on the AutoForm.
TIP When collecting leads on a web site, select Lead as the default value for Organization Type and select the resource who screens and distributes your incoming web leads as the default value for Account Manager. Ownership can be re-assigned at a later date from the Edit Organization page.
NOTE Organization Address information is copied into the Contact Address fields in Autotask, unless the Contact Address fields are put on the form.
Adding fields from the Contacts table to your AutoForm
- Contact First Name and Last Name are required on the form. Make sure you check both the Displayed and the Editable check boxes for both fields.
- All other fields are optional, but best practices dictate that email and phone number should also be required, so the user can be contacted.
Adding fields from the Opportunity table to your AutoForm
If the form includes fields from the Opportunity table, a number of fields are required:
- Opportunity Owner - This is a required field for an Autotask Opportunity. When creating a form, select a default owner from the list of all resources. Once in Autotask, the name of the Opportunity Owner can be changed.
- Opportunity Stage - Select an appropriate Opportunity Stage from the list as the default opportunity, probably what you would consider Stage 1. Opportunity Stages are set up in Admin so your company might have a stage specifically for Opportunities created through AutoForms.
- Opportunity Status - Select an appropriate Opportunity Status (probably Active) from the list of Opportunity Statuses set up in Admin.
- Opportunity Projected Close Date Offset - Projected Close Date is a required field for an Autotask Opportunity. If you enter a number in the Projected Close Date Offset field that is the average length of you product sales cycle, Autotask will calculate a Projected Close Date for the opportunity.
- Opportunity Projected Close Date - Alternatively, click the calendar icon for this field and select a firm Projected Close Date.
TIP All these fields should be hidden. Potential customers do not care about your lead tracking system and would only be confused.
All other opportunity fields are optional.
Adding fields from the To-Dos and Notes tables to your AutoForm
To-dos and notes create action items in Autotask. If the form generates either to-dos or notes, the following fields are required:
- To-Do (or Note) Action Type - This determines the type of follow-up to the lead submission or request for follow-up. The action types that can be used and will be displayed on the drop-down list are the ones defined in your Left Navigation Menu > Admin > Admin Categories > Features & Settings > Sales & Opportunities > Action Types list. Often, the Action Type will be a phone call.
- To-Do (or Note) Assigned To - For the follow-up to happen, a Resource needs to be assigned to it. The drop-down list will show the list of Resources in Left Navigation Menu > Admin >Resources/Users (HR) > Resources/Users (HR) > Resources.
- To-Do (or Note) Description - Enter a brief description of the required action. Example: "Call to qualify new web lead".
- To-Do (or Note) End Date - A date by which the action has to be performed has to be entered. After that date, the action will become overdue.
- Instead of a fixed end date, which might be problematic if the form is to be used permanently, you can include a To-Do and Note Start Date Offset and To-Do and Note Start Date Duration. Enter the number of days after the request is submitted that the to-do will begin, and the length of time (in minutes) before it becomes overdue. Autotask will take these values and calculate the to-do or note End Date, after which it becomes overdue.
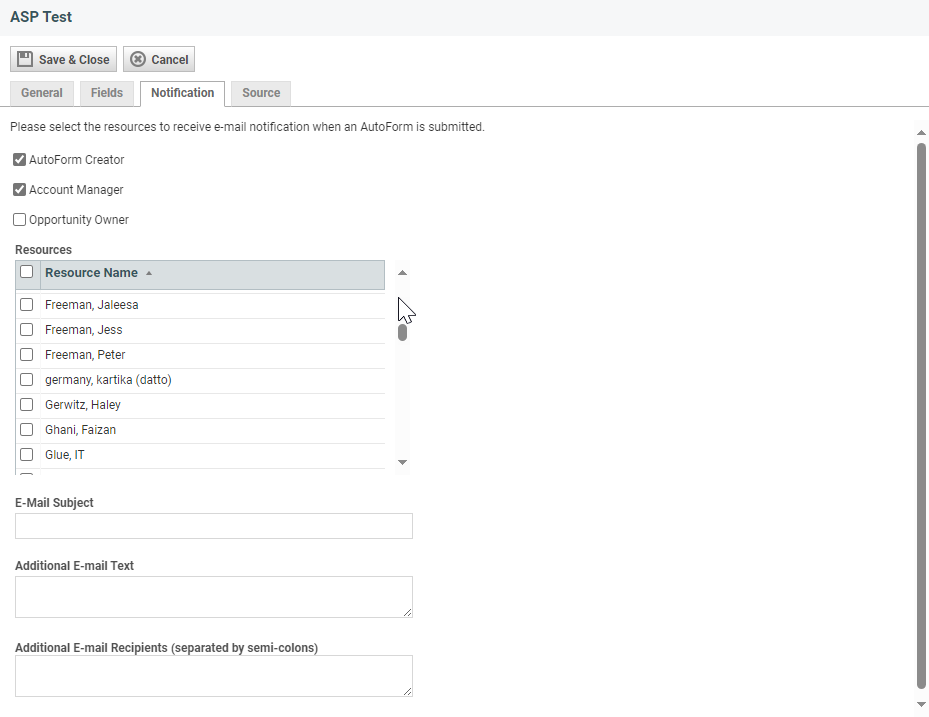
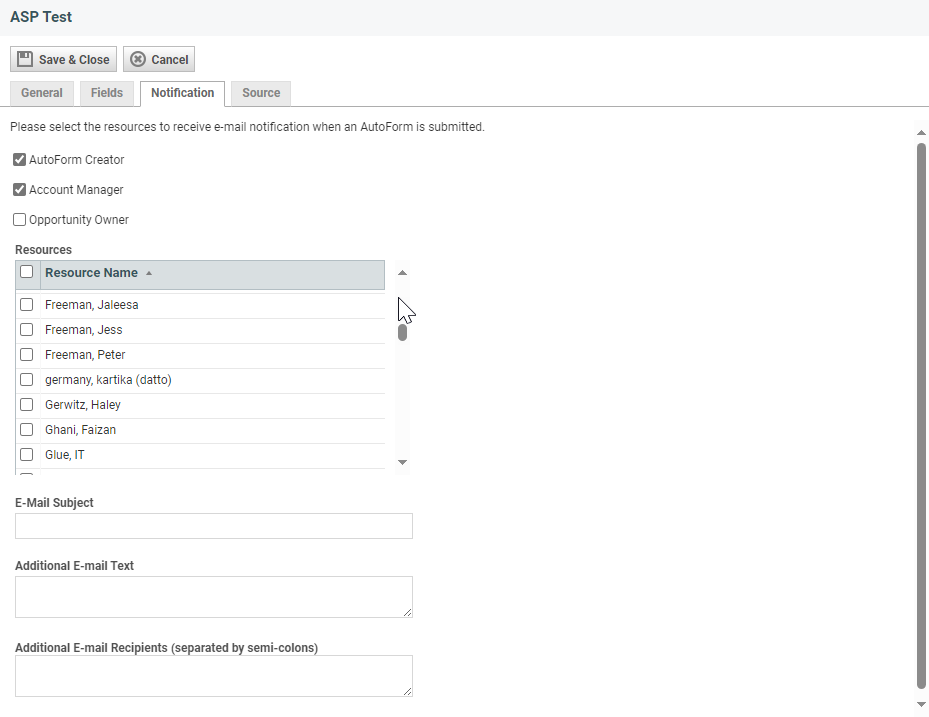
On the Notifications tab, you can specify which internal resources should receive an email notification when an AutoForm is submitted.
Refer to Generating a manual notification.
When you click the Source tab, Autotask will generate and display the HTML source code for your form with the options you selected.
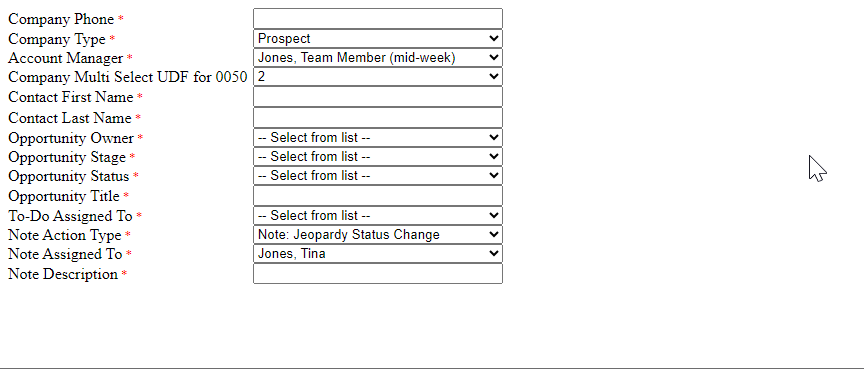
To view your form in its current state, click the Preview button in the Source window.
If you are satisfied with your AutoForm, close the Preview window and copy the entire source code to you clipboard.
- To edit and publish your form, paste the copied source code text into Notepad or another HTML editor, surrounded by the following HTML tags:
<html>
<body>
Insert source code text here
</body>
</html>
If you have HTML programming skills, you will be able to add additional text, headers, logos, etc. An example is shown below (edits in Red):
<html>
<body>
<p><font FACE="Arial" SIZE=2> Please enter your information:
<br>
Insert source code text here
</body>
</html>
This will add the sentence Please enter your information: to the top of your form and apply an Arial font size 2 to your form.
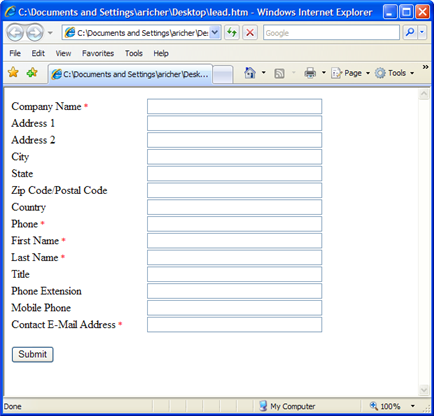
- To publish the form as is, save the file with an .htm extension (to your desktop, for example).
- Then, double-click the file name to view the form in your browser. You may see an "active content" warning. You will need to "Click here for options" and allow blocked content.
- Click Yes to open the form in active mode.
You can now use the form as a data entry interface for the Autotask site it was created on. When you click the Submit button, the Organization, Contact and any other entity information you put on your form will be entered into the respective tables.
NOTE All contacts created through AutoForms will automatically be set to Active.
Make sure you test your form before you publish it to a wider audience on your web site.


